Plastic injection moulding turns out billions of components every year. Even small process variations spawn defects that undermine part function, assembly fit, or structural integrity. Short shots—where the mould cavity is not completely filled—rank among the most common and economically damaging defect categories. Catching them reliably at production speed takes the right illumination strategy.
Darkfield illumination is the technique best suited to revealing the subtle surface and geometric differences that set a complete part apart from a defective one. By placing low-angle LED illuminators around the part, machine vision systems can pick up incomplete features, missing geometry, and surface voids that stay invisible under conventional front-lighting or diffuse dome illumination.
1. Defect Types in Injection Moulded Parts
Knowing which defects have to be caught is what sets the illumination strategy for the vision system. Injection moulding defects fall into several categories.
Short Shots
A short shot happens when molten plastic fails to fill the mould cavity fully before it solidifies. The result is a part with missing geometry: incomplete ribs, absent bosses, missing snap-fit features, or unfilled thin sections. Short shots stem from insufficient injection pressure, low melt temperature, poor venting, or contaminated material. They are among the most critical defects because a short-shot part is dimensionally non-compliant by definition.
Sink Marks and Surface Voids
Sink marks are depressions on the part surface left by localised shrinkage during cooling. They usually show up opposite thick sections or ribs where cooling is uneven. Surface voids are similar but mark a complete absence of material at a specific point. Both defects shift the surface geometry of the part and hurt the fit and finish of the assembly.
Flash, Burrs, and Mould Line Irregularities
Flash is excess material that has escaped the mould cavity along the parting line, ejector pin locations, or side core faces. It is a geometric excess rather than a deficit, and it harms assembly and function just as much. Mould line irregularities cover raised parting lines and ejector pin marks that run past tolerance.

Do you want help choosing the product?
2. Why Darkfield Illumination Works for Plastic Part Inspection
Plastic injection moulded parts pose a specific optical challenge. Most production plastics carry a semi-gloss or gloss finish that turns highly specular under conventional illumination. Diffuse dome lights or front-lit ring lights tend to wash out the subtle surface features that separate a defect-free part from a short-shot or sink-marked one.
Darkfield illumination relies on grazing-incidence light. The LED illuminator sits at a low angle to the part surface—typically between 10° and 25° from the horizontal plane. At this angle, smooth areas of the surface bounce the light away from the camera, so the camera sees a dark background. Any surface irregularity—a missing rib, a sink depression, a void, a raised flash—scatters light towards the camera and shows up bright against the dark background.
Contrast Enhancement for Subtle Geometry
The contrast edge darkfield gives on plastic surfaces is substantial. A sink mark only 0.2 mm deep may produce a negligible grey-level difference under diffuse illumination. Under darkfield at a 15° angle, the same feature throws a bright highlight at its leading edge and a dark shadow at its trailing edge. The signal-to-background ratio climbs by an order of magnitude or more, which feeds straight into more reliable detection and fewer false rejects.
Detection of Missing Features
Short shots that leave a feature completely absent—a missing boss, an incomplete rib—create a geometry discontinuity at the boundary of the missing area. Under darkfield illumination, that edge stands out as a sharp bright line against the surrounding dark surface. The absence of expected geometry is caught by comparing the acquired image with a reference golden-part image. Any area where bright edges are expected but absent points to a short shot.
3. Illumination Setup for Injection Moulding Inspection
Effective darkfield inspection of injection-moulded parts calls for careful design of the illumination geometry, wavelength selection, and synchronisation with the vision system trigger.
Illuminator Geometry and Angle
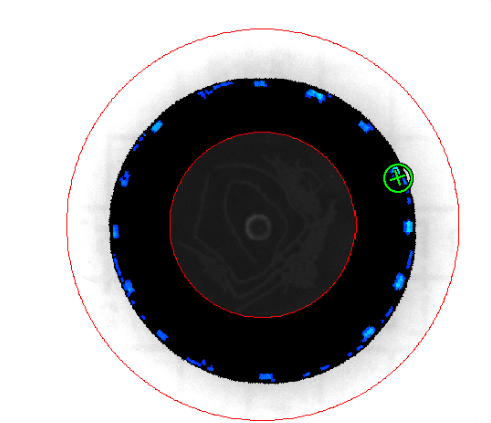
For parts with rotationally symmetric geometry—round caps, cylindrical housings, symmetrical connectors—a ring illuminator centred on the camera axis gives omnidirectional darkfield coverage. Every surface feature and edge is lit equally whatever its orientation. That clears the directionality problem of linear darkfield illuminators, where features running parallel to the light direction may not scatter enough light to be caught.
For flat or rectangular parts—panels, covers, flat brackets—a combination of directional low-angle illuminators from two or four sides gives uniform grazing-incidence coverage. The illumination angle should be chosen to suit the surface finish: glossy surfaces want lower angles (10° to 15°) for best contrast, while semi-matt surfaces may do better at 20° to 25°.
Wavelength Selection for Plastic Surfaces
White light is the standard pick for general plastic inspection when the part has to be checked for both geometric defects and colour or surface quality at once. Red or near-infrared wavelengths (630–850 nm) give good contrast on many plastic surfaces and cut sensitivity to ambient light. Blue wavelengths (450–470 nm) lift contrast on light-coloured or transparent plastics.
Strobe Operation and Synchronisation
Injection moulding inspection is usually done inline at the output of the moulding machine, where parts move at rates of 10 to 60 per minute. Strobe illumination—synced to the camera trigger—freezes part movement during exposure, rejects ambient light, and stretches LED illuminator life by running in pulsed mode for most of the production cycle.
4. Multi-View Inspection Strategies
Complex injection-moulded parts—connectors, housings, medical components—cannot be fully inspected from a single camera viewpoint. Short shots and missing features can sit on any face. Multi-view inspection stations use two, four, or more camera-illuminator pairs around the part to give complete 360° coverage.
Sequential Multi-Illuminator Firing
When several illuminators and cameras surround the part, strobe synchronisation becomes critical. Each illuminator has to fire on its own and sync with its matching camera exposure. Sequential firing makes sure each image is captured with only one illuminator active, heading off cross-illumination. RODER Vision LED illuminators support external trigger input for precise synchronisation with vision system controllers.
Combining Darkfield with Backlight
For transparent or semi-transparent plastic parts—medical vials, optical lenses, clear packaging components—pairing darkfield front illumination with backlight gives complementary inspection. The darkfield image reveals surface defects and geometric features, while the backlight image reveals internal voids and contamination through transmitted light. Both images can be captured in sequence at the same station.
5. Integration Considerations
Ambient Light Control
How well darkfield illumination works depends on shutting out stray ambient light. Factory overhead lighting falling on the part surface brightens the dark background and weakens defect contrast. Inspection enclosures with blackout panels are the standard answer. Where a full enclosure is not practical, high-intensity strobe with short camera exposure times (50–200 µs) gives effective ambient light rejection.
Part Positioning and Fixture Design
Darkfield illumination is sensitive to part height and tilt. A height variation of 2–3 mm can change the effective illumination angle enough to shift the contrast of surface features. Parts should reach the inspection station in a repeatable position using mechanical stops, nests, or vacuum fixtures.
Thermal Stability of the Illuminator
Injection moulding machines run continuously across long production batches. RODER Vision illuminators build in HTTM (High Temperature Thermal Management) technology, which holds LED junction temperature within tight limits whatever the ambient temperature. That keeps the darkfield illumination level constant from the start to the end of the shift, with no periodic recalibration of the vision system threshold.
Products and Technologies
RODER Vision Illuminator Families for Plastic Injection Moulding Inspection
The RODER Vision product families below are well suited to darkfield and direct inspection of injection-moulded plastic parts.

DC2 — Low Angle LED Ring
Low-angle omnidirectional ring illumination for darkfield inspection of plastic surfaces. Ideal for round parts, caps, and cylindrical housings. Multi-wavelength. Strobe compatible.

DC6 — High Density LED Ring
High-density ring illuminator for uniform darkfield coverage. HTTM thermal management for 24/7 production. Suitable for small to medium-format plastic components.

DL5 — High Intensity LED Matrix
Very high peak intensity in strobe mode. Ideal for directional low-angle darkfield on flat plastic panels and covers. High-speed inline inspection.

DL1 — LED Matrix Illuminator
Versatile LED matrix for direct and angled illumination of plastic components. Wide format range for different part sizes. Available in multiple wavelengths for colour and surface inspection.
Frequently Asked Questions
A short shot happens when the mould cavity is not filled fully by the molten plastic before it solidifies, leaving a part with missing geometry such as incomplete ribs, absent bosses, or unfilled thin sections. It is caused by insufficient injection pressure, low melt temperature, poor venting, or contaminated material, and the result is a non-conforming part by definition.
Darkfield places the LED source at a low grazing angle to the part surface. Smooth areas reflect light away from the camera and read dark, while surface irregularities such as edges, depressions, voids, and missing geometry scatter light towards the camera and read bright against the dark background. That contrast makes even subtle geometric defects visible at high signal-to-background ratios for reliable detection at production speed.
It depends on the surface finish. Glossy surfaces want low angles of 10 to 15 degrees from horizontal for the darkest background, while semi-gloss surfaces often do better at 15 to 25 degrees. A ring illuminator at the chosen angle gives omnidirectional coverage.
Yes. Flash and burrs are raised surface features that scatter grazing-incidence darkfield light towards the camera, so they show up as bright lines or bright patches along parting lines and ejector pin locations.
The most effective answer is to enclose the inspection station with blackout panels. Where a full enclosure is not practical, high-intensity strobe operation with short camera exposure times of 50 to 200 microseconds gives effective ambient light rejection.
Contacts & Information
Contact for general information : info@roder.it
Systems and Sensor Integration Partner : www.roder.it
RODER Artificial Vision Division : www.rodervision.com
RODER Instruments Division : www.innovacheck.com
More information about RODER VISION : about us
The information on this website is provided for informational purposes only. Although it has been prepared with the utmost care, it does not constitute a contractual offer or a binding commitment to supply. It may contain transcription, translation, or typographical errors. For precise and up-to-date information, please contact our company directly.
Please note: Some images on this website have been intentionally generated using Artificial Intelligence (AI). This is due to the fact that, for many applications and projects, it is not possible to disclose photographs of the actual installation or system due to confidentiality agreements, contractual clauses, and Non-Disclosure Agreements (NDAs).
